DIY Mishaps: Mercury Glass Lamp
9:10 PM
One of my many aggravating annoying unique qualities is that I think I can do anything. I think that if I saw it on Pintrest, HGTV, or DIY network I can do it. If there is a will there's a way... right? I would like to think of that as an endearing quality.
I see it as: Headstrong, Determined, Committed, purposeful, etc.
My Friends See: Stubborn, Annoying, persistent, and my favorite "OH so you really think you know how to use a nail gun because the PROFESSIONAL person did on TV?"
I'm sure I can.
**Waves Nail Gun around as people dive for cover**
I digress.
So I've seen it a few times were people have done Pottery barn knock offs. I ADORE pottery barn. Everything about it. From the Beautiful furniture to even the little knick knacks that you know are just gonna collect dust and serve no purpose. I love it all.
Sadly every time I try and walk through the door to a Pottery Barn the moths come out my wallet and fly me away. *Sigh* A girl can dream right?
So I thought I would try out these "OH SO EASY!" Pottery Barn DIY Projects.
Mercury Glass Lamps.
Above is a couple of mercury glass lamps from Pottery Barn. Retail Value is $160-200.
(My wallet moths are now weeping)
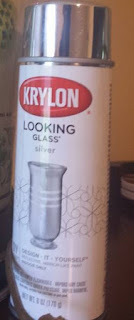
So the jest of it is. That you buy the Looking Glass spray paint from Krylon and just spray it on there. Let it dry.
WRONG. OH WAS I SO WRONG. Please see the below picture of my horrible attempt at being a DIY Master.
So Here are the steps I followed from other posts I've read. I'll fill you in on the Hiccups afterwards.
Step One:
Clean that bi**h up.
Grab an old lamp. In this case it was one that my father had lying around. And Clean it really well. Really, really, REALLY well.
Rub that lamp so well that you swear a gene will pop out and give you that brown leather Micheal Kors bag you've been eyeing for 5 yrs now but you too cheap boyfriend fiance Husband wont get for you!!!
Took that too far? Thought so..
Step Two:
Don't be silly wrap your..... Plug? Cord? IDK
I guess that works the same way. USE PROTECTION!
Tape the areas up that you don't want to get paint on. Such as cords, plugs, any wood trim, etc.
Make sure to take a little extra care with this. A little more time now will result in far better work later.
Step Three:
Paint.
Sounds easy enough.
HAHA boy was I wrong.
HICCUPS:
Please please please please PLEASE!!
Do multiple thin coats. Do not be impatient like me. When they said paint boy did I paint! I could have made a sport out of it. I decided to just go crazy with the two cans I bought thinking it would figure it self out. NOPE. I got drips and uneven surfacing. See below for the horror.
And after a few days. More and more of these spots started showing up. IDK What thats about.
The only kind of cool thing that I like that I didn't intentionally do. Though I wish I could take credit for. The etching. I didn't expect the peacock to show through. You don't see the colors but you see the patter as if it were engraved into a metal lamp.
The plan is to sand it down with a fine grit sand paper later on and try this out again. I would suggest using a good quality primer first and then do multiple light coatings. Allow the paint to fully dry between each coats. And if your a little impatient like me please be sure to take a chill pill and a glass of wine. The lamp is not going anywhere. Seriously. If you see it grow legs and walk off please tell me what kind of wine you are drinking cause boy do I need it
The final product.
Over all I don't think I did a terrible job. I will try and fix this later on once I am done nursing my wounds. I'll be sure to let you guys see the results. If anyone has done this before and has tips on how to fix this. Please feel free to share. I can use all the help I can get. =)


0 comments